Practical Sessions Setup
Caution
You don’t have the authorization to feed any of this content to any online LLM for any purpose. If for some reason, you need to interact with a LLM, you may use an open-source model on your local machine to feed the course content. See llama.cpp to install a CPU efficient LLM inference and use your own computer to ask your questions.
Installing Tools
GCC (GNU Compiler Collection) is a free and open source compiler suite mainly used in the Linux world.
GDB (GNU DeBugger) is its associated debugger, able to run programs step by step and to investigate bugs and crashes.
Valgrind is a runtime analysis tool that can be used to debug programs that have already been compiled. Thanks to its memcheck tool, which is used by default, it can be used to debug segmentation faults, memory leaks and misuse of pointers.
First we’ll use them through Visual Studio Code, but we’ll delve into command line incantations some point later on 😉. If you prefer to use another code editor, no problem but you’ll be on your own.
Depending on your operating system, here is a short guide to get you started:
Windows
There are multiple ways to install GCC & GDB on a Windows machine. For this course, we suggest to avoid the problem altogether by using it through WSL, i.e., a built-in virtual machine running a Linux distribution (Ubuntu usually). If you want to install it another way, that’s totally fine but you’ll be on your own.
However, Valgrind is not available on Windows, so you’ll need WSL for it.
If WSL is not installed yet. Open a command line and type wsl --install. You’ll be prompted for a new username and password to create a user inside the VM. Choose whathever you want.
Important
Don’t forget your password! You can use something simple, or the same one as your Windows local user for instance. But you’ll be asked to re-enter it soon after.
C:\Users\pierre>wsl --install
Téléchargement : Ubuntu
Installation : Ubuntu
La distribution a été installée. Il peut être lancé via 'wsl.exe -d Ubuntu'
Lancement : Ubuntu...
Provisioning the new WSL instance Ubuntu
This might take a while...
Create a default Unix user account: pierre
New password:
Retype new password:
passwd: password updated successfully
To run a command as administrator (user "root"), use "sudo <command>".
See "man sudo_root" for details.
When the installation succeeds, you should now be in a Linux shell (i.e., the Linux command line). First, update your package repository by typing sudo apt update then your new password.
pierre@pavilion:/mnt/c/Users/pierre$ sudo apt update
[sudo] password for pierre:
Hit:1 http://archive.ubuntu.com/ubuntu noble InRelease
Get:2 http://security.ubuntu.com/ubuntu noble-security InRelease [126 kB]
...
Get:56 http://archive.ubuntu.com/ubuntu noble-backports/multiverse amd64 c-n-f Metadata [116 B]
Fetched 39.8 MB in 7s (5933 kB/s)
Reading package lists... Done
Building dependency tree... Done
Reading state information... Done
128 packages can be upgraded. Run 'apt list --upgradable' to see them.
Finally, install GCC, GDB, and Valgrind by typing sudo apt install build-essential gcc-multilib gdb valgrind.
pierre@pavilion:/mnt/c/Users/pierre$ sudo apt install build-essential gcc-multilib gdb valgrind
Reading package lists... Done
Building dependency tree... Done
Reading state information... Done
The following additional packages will be installed:
  bzip2 cpp cpp-13 cpp-13-x86-64-linux-gnu cpp-x86-64-linux-gnu dpkg dpkg-dev fakeroot g++ g++-13
  g++-13-x86-64-linux-gnu g++-x86-64-linux-gnu gcc gcc-13 gcc-13-base gcc-13-x86-64-linux-gnu gcc-x86-64-linux-gnu
...
Processing triggers for man-db (2.12.0-4build2) ...
pierre@pavilion:/mnt/c/Users/pierre$ exit
exit
Let’s now configure Visual Studio Code to use the WSL VM. If not done yet, install it by typing winget install -e --id Microsoft.VisualStudioCode in a Windows command line.
C:\Users\pierre>winget install -e --id Microsoft.VisualStudioCode
Trouvé Microsoft Visual Studio Code [Microsoft.VisualStudioCode] Version 1.109.2
La licence d’utilisation de cette application vous est octroyée par son propriétaire.
Microsoft n’est pas responsable des paquets tiers et n’accorde pas de licences à ceux-ci.
Téléchargement en cours https://vscode.download.prss.microsoft.com/dbazure/download/stable/591199df409fbf59b4b52d5ad4ee0470152a9b31/VSCodeUserSetup-x64-1.109.2.exe
  ██████████████████████████████   120 MB /  120 MB
Le code de hachage de l’installation a été vérifié avec succès
Démarrage du package d’installation... Merci de patienter.
Installé correctement

C:\Users\pierre>exit
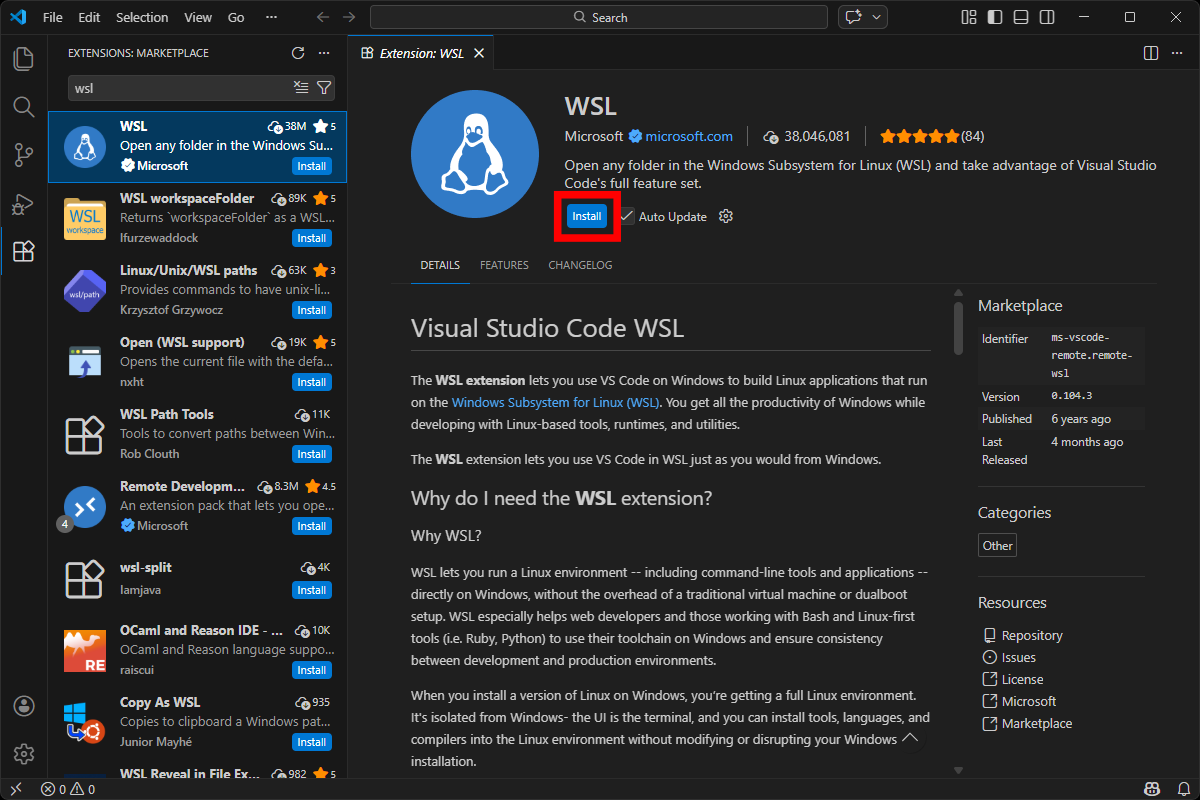
In Visual Studio Code, install Microsoft’s official WSL extension.
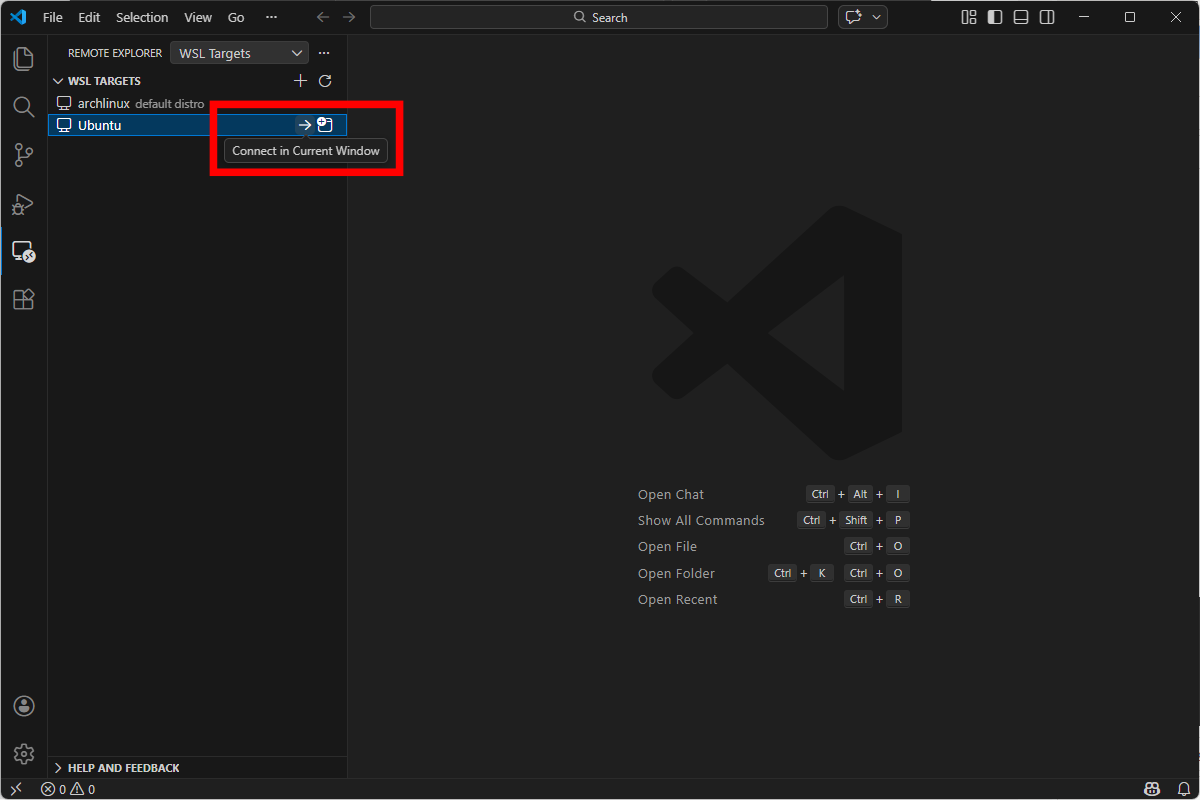
Then, click on the remote explorer on the left panel, and connect to your Ubuntu VM.
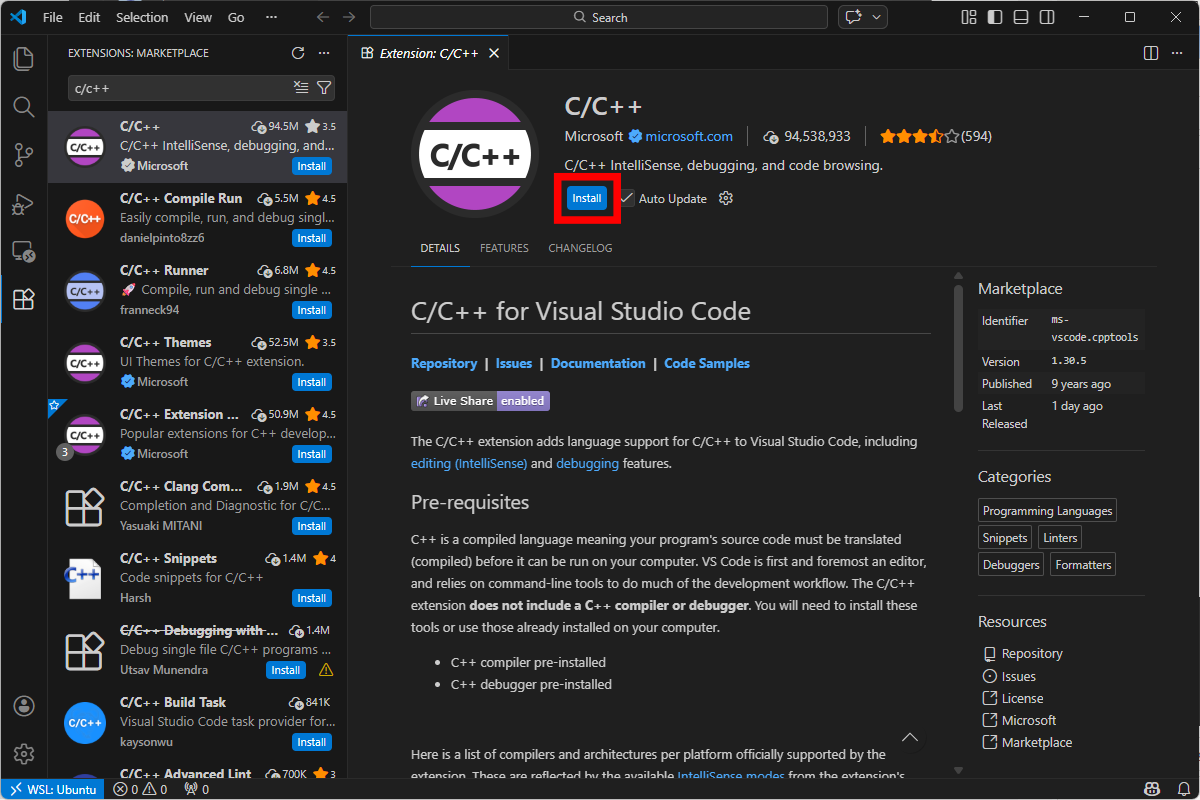
Once connected, install Microsoft’s official C/C++ extension.
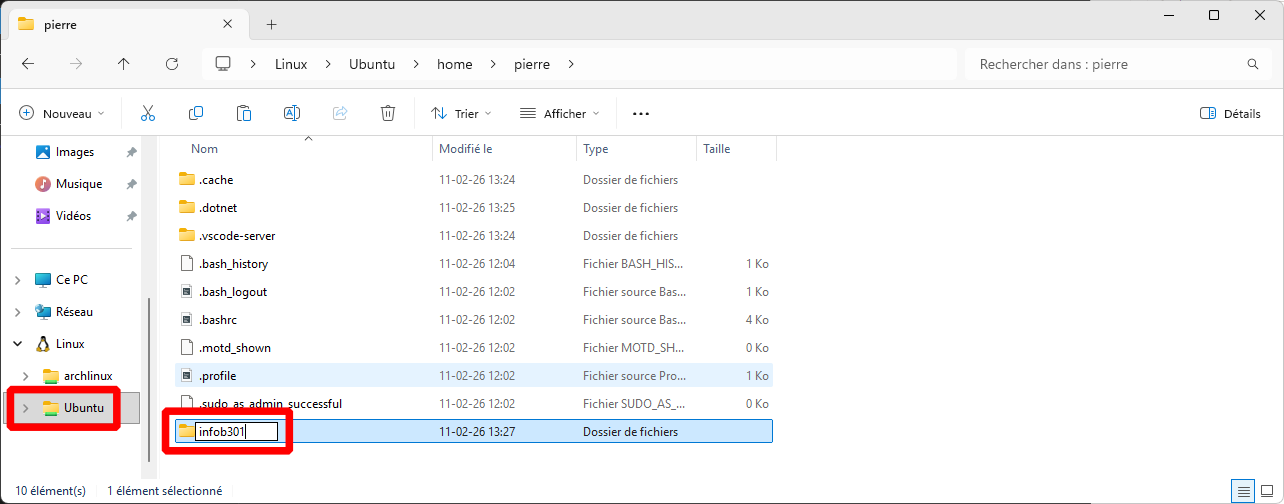
Open a file explorer, go to your Ubuntu drive, and create a project directory somewhere.
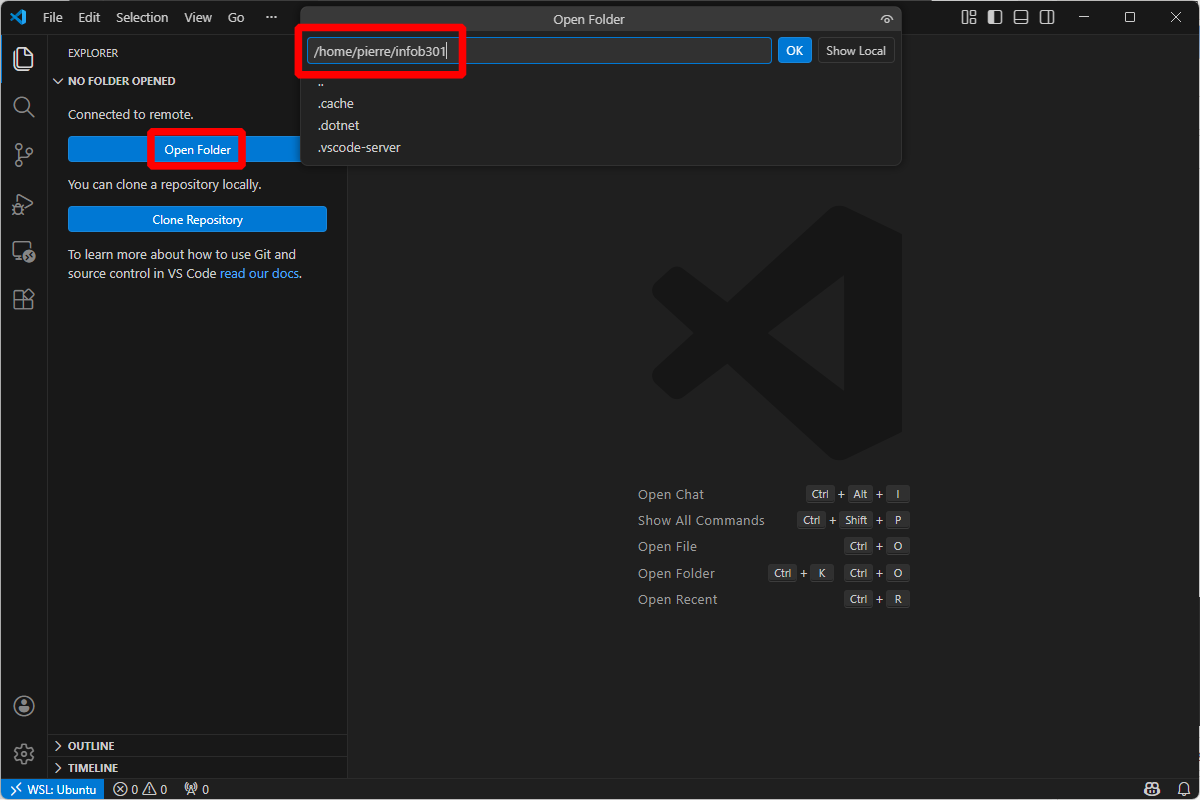
Go back to Visual Studio Code, and open the newly created folder.
Warning
Don’t click on “Show Local”! Otherwise you’ll be disconnected from the Ubuntu WSL.
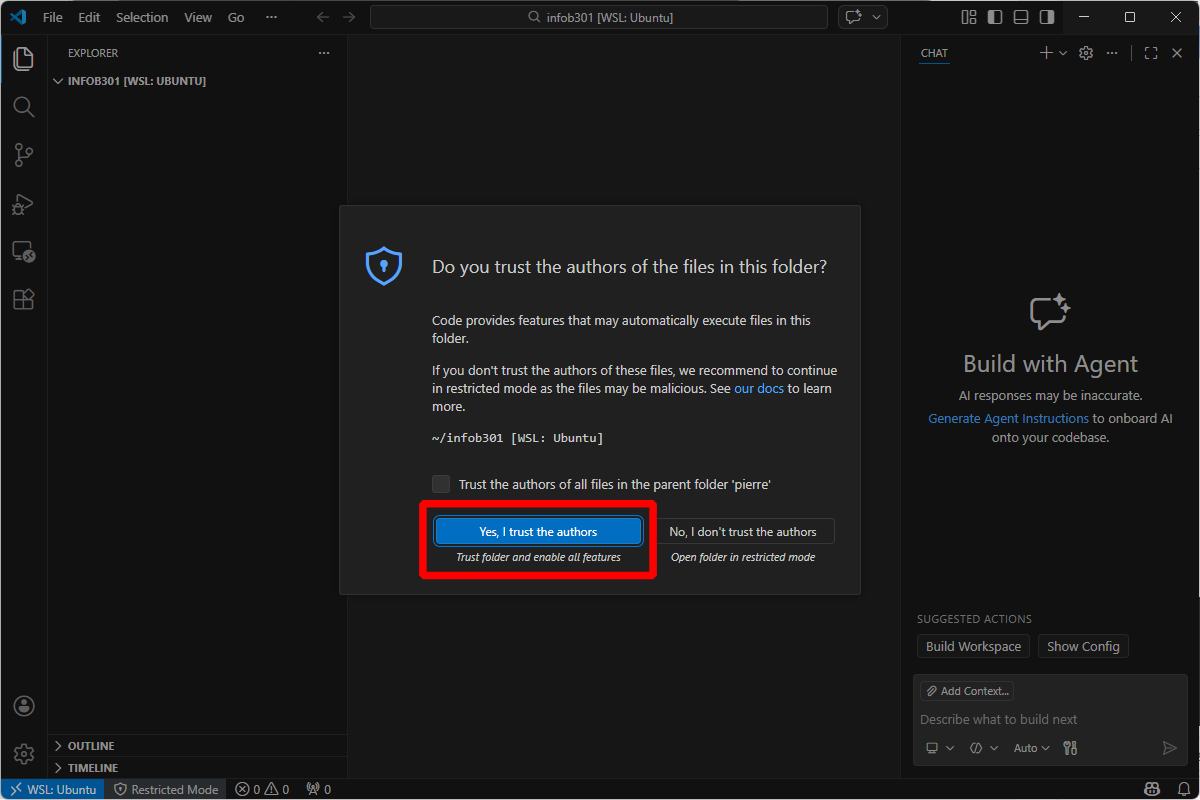
If asked, click on “Yes, I trust the authors”. Otherwise you won’t be able to use your extensions.
You can now go to the next part.
macOS
Note
Please note that I don’t own a Mac computer, so this guide is best-effort only. Please, feel free to reach out to the teaching assistant for help.
We suggest installing and using Homebrew on macOS.
Once installed, make sure you’re up to date.
$ brew update
$ brew upgrade
Then, install the needed packages.
$ sudo xcode-select --install
$ brew install gcc gdb valgrind
Then, if not done yet, install Visual Studio Code by following Microsoft’s instuctions.
Inside Visual Studio Code, install Microsoft’s official “C/C++” extension.
You can now go to the next part.
Linux (Debian-based)
On Debian (or Ubuntu, or Linux Mint), you need the following packages:
$ sudo apt install build-essential gcc-multilib gdb valgrind
Then, if not done yet, install Visual Studio Code by following Microsoft’s instructions. However, if you want updates, we suggest installing the apt repository instead of installing a deb package directly.
Inside Visual Studio Code, install Microsoft’s official “C/C++” extension.
You can now go to the next part.
Linux (Redhat-based)
On Redhat distributions (Fedora mostly), the following should work (I did not test it myself, so feel free to reach out to the teaching assistant):
$ sudo dnf group install "Development Tools"
Then, if not done yet, install Visual Studio Code by following Microsoft’s instructions.
Inside Visual Studio Code, install Microsoft’s official “C/C++” extension.
You can now go to the next part.
Linux (Others)
At this point, you probably know what you’re doing. But feel free to reach out to the teaching assistant for help.
In Visual Studio Code, install Microsoft’s official “C/C++” extension.
You can now go to the next part.
Running the Debugger
In a new file, you can now write a simple C program to validate your installation. Here’s an example:
#include <stdlib.h>
#include <stdint.h>

int main(void) {
    uint32_t value = 4;
    value += 1;
    return EXIT_SUCCESS;
}
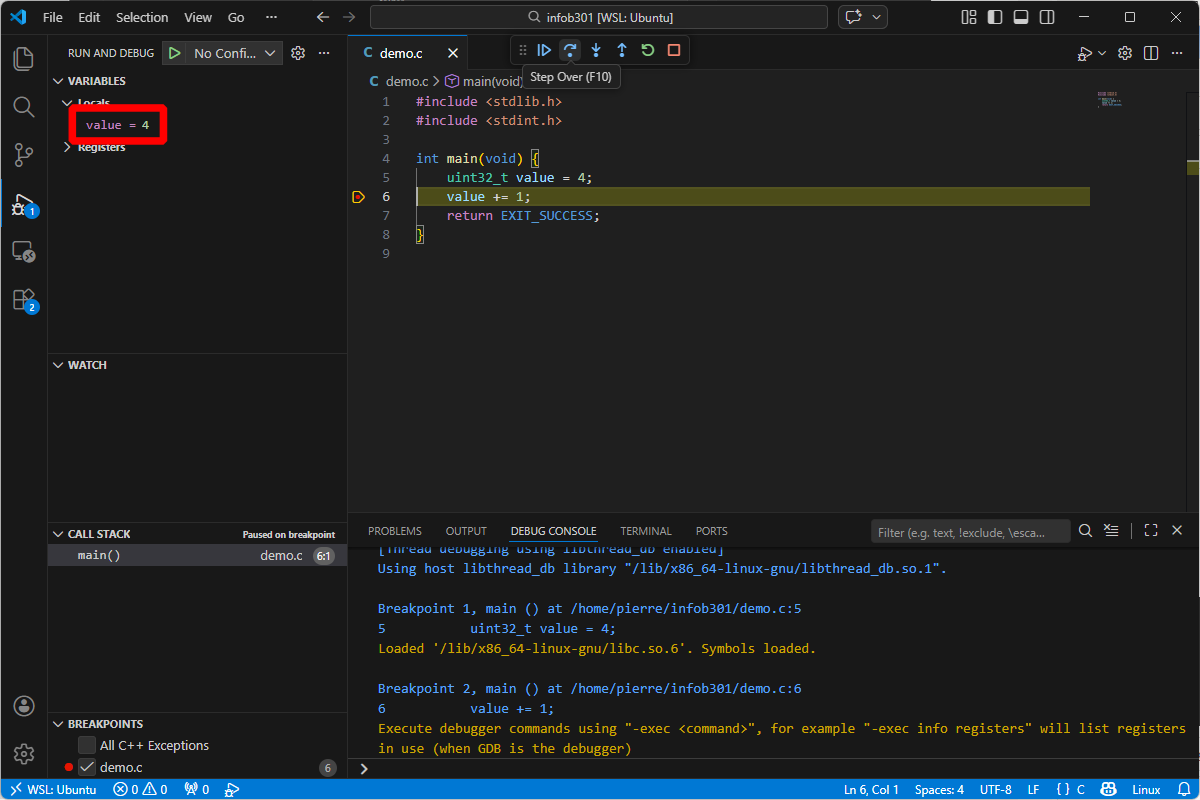
Then, add a breakpoint at line 6 (for instance), and invoke the debugger 🪄!
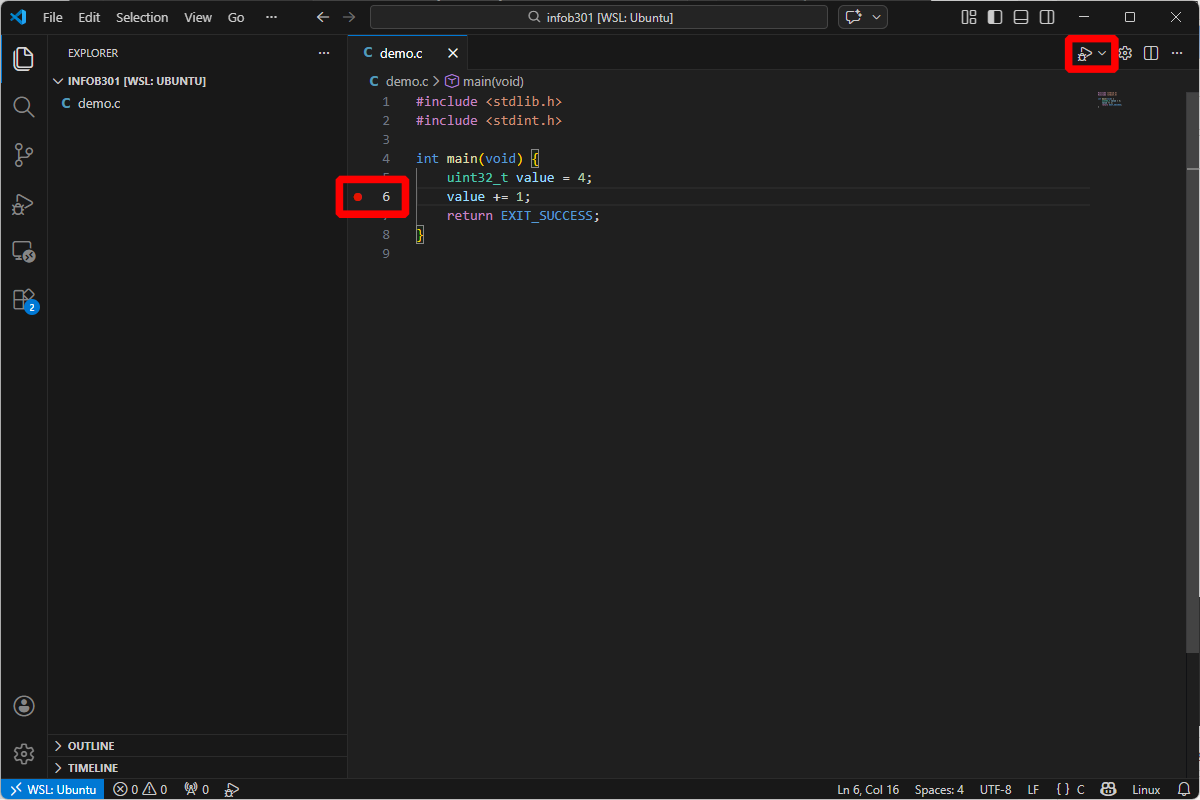
If everything went well, you should be able to observe the local variable value in the left panel. You can run the program step by step with the buttons on the top of the screen.